Configure Notifications
You can set up the system to send a notification to predefined users (internal or external) in case an event is triggered. To enable this feature, follow the steps below.
Set Up Notification Targets
You must set up notification targets, which define the protocol settings for the responsible email server.
Choose from the menu.
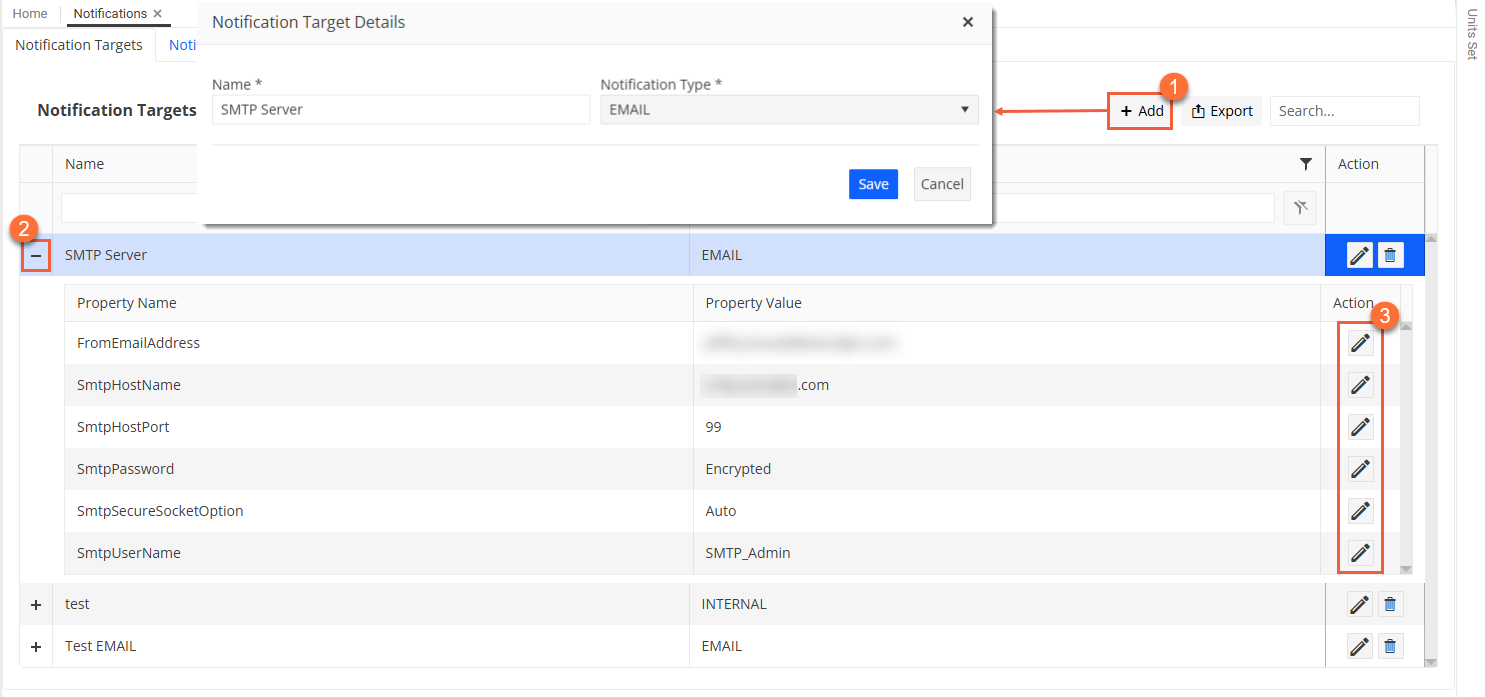
On the Notifications pane, go to the Notification Targets tab.
Click
 Add on the toolbar.
Enter a name that identifies the notification target and select EMAIL for the notification type.
Save your entries.
Result
A row for the new notification target entry gets added to the grid.
Expand the details for the new notification target in the grid using the
in the first column of the row.For each property, click
 in the Action column to define the relevant property value.
See below for an example:
Define Notification Groups
Once you have set up the notification targets, you set up the notification groups, which are named and define the frequency, properties and members to be notified.
Still on the Notifications pane, go to the Notification Groups tab.
Click
Add on the toolbar.In the Notification Group Details dialog, enter data as follows:
Field
Description
Name
Specify a name that identifies the notification group.
Target
Select the target that you defined in the Set Up Notification Targets section.
Frequency
Choose how often events should be scanned and notifications sent to users (for example, immediately, every five minutes, hourly, daily).
Description
Enter a description to provide more information about the notification group.
Save your entry.
Result
A row for the new notification group entry gets added to the grid.
Expand the details for the new notification group in the grid using the
in the first column of the row.On the Notification Group Properties tab, for each property, click
in the Action column to define the relevant property value.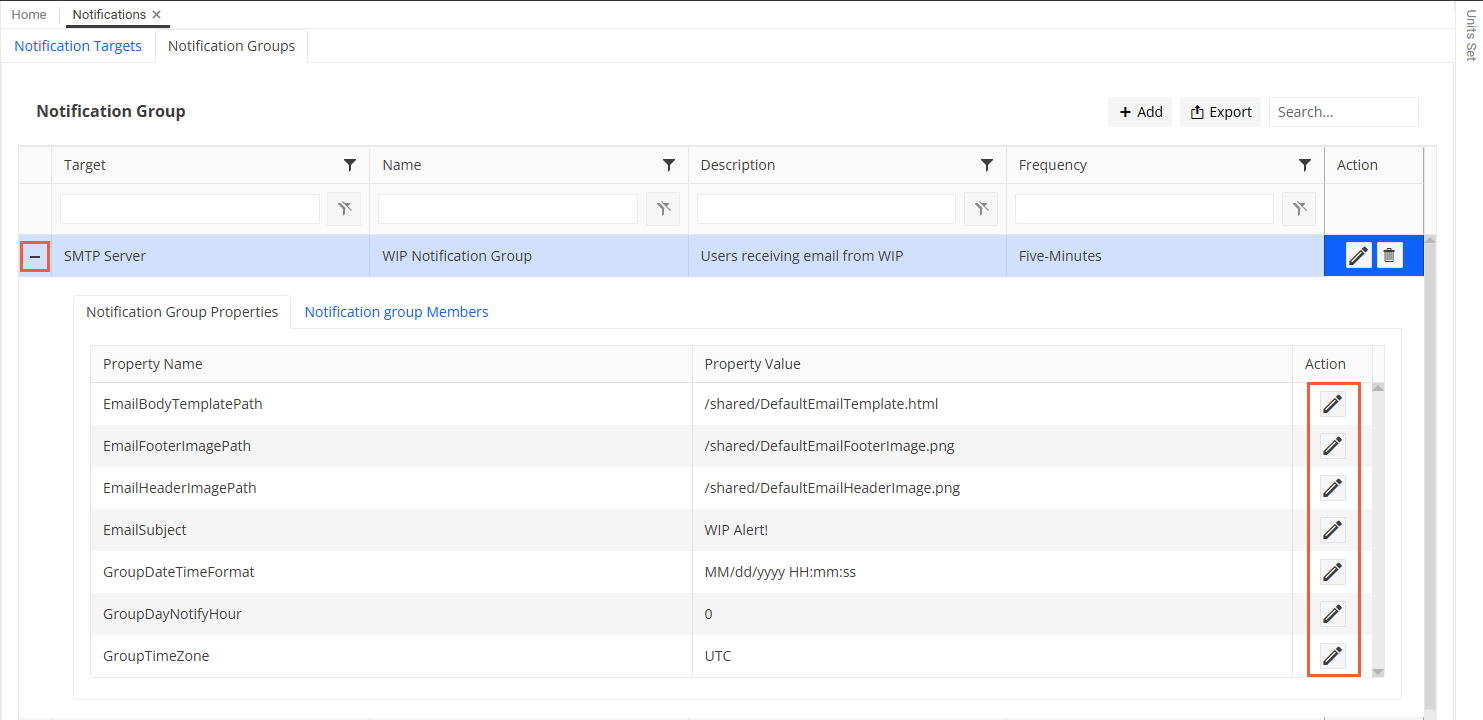
On the Notification Group Members tab, add members to the notification group using the
Add button and define the names, the user names and email addresses as required.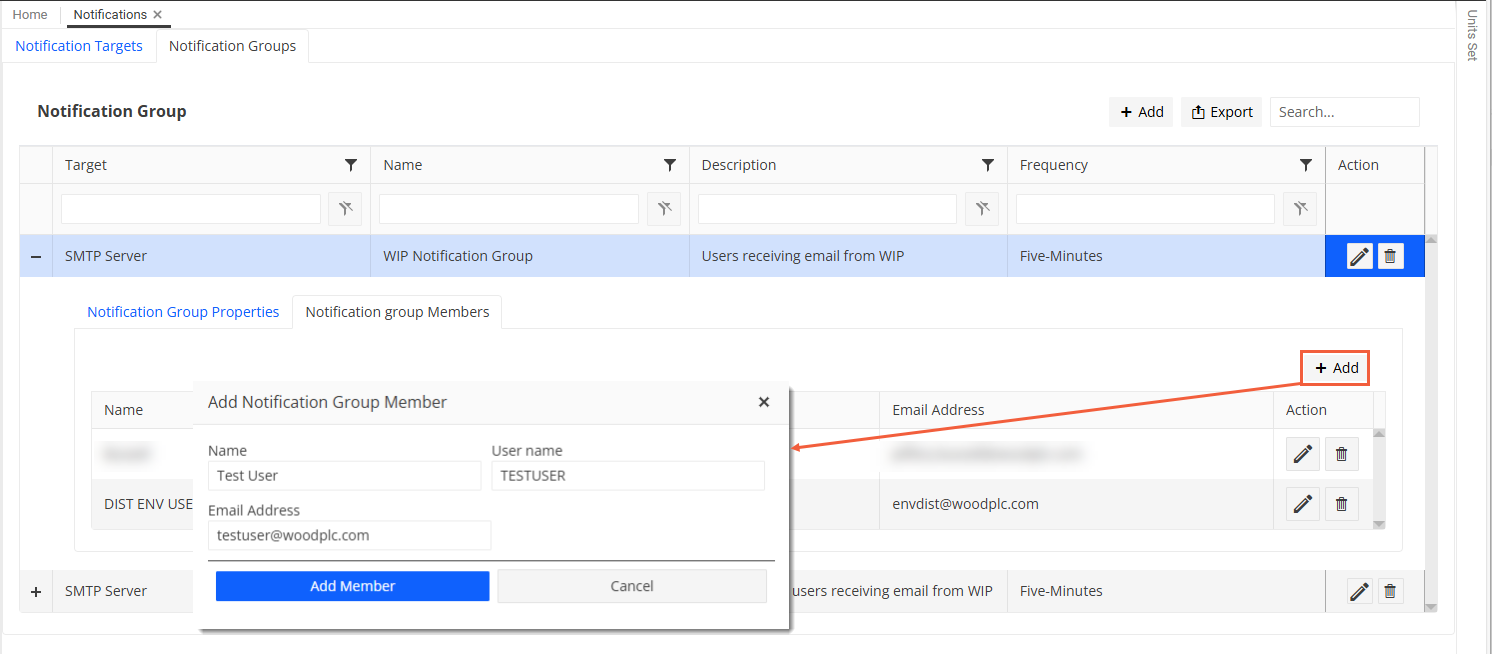
Click Add Member.
Result
A new row for each member gets added to the grid. You can update or delete the entries using the corresponding icon in the Action column.
Assign the notification group to the event definition and define the message text to be sent during event configuration. For more information, see Configure Events.
See also