Configure Data Connectors
Data connectors within WIP are designed to connect to external data sources using specific protocols and interact with the WIP External Data Services (for more information, see Data Connectors).
You can create, edit or delete data connectors as described below.
Create Data Connectors
Choose from the menu.
On the Data Connectors pane, click
 Add on the toolbar.
In the Connection Configuration dialog, enter the required values in the following fields:
Field
Description
Connection Name
Enter a name that uniquely identifies the data connector.
Location
Indicate where the data connector is installed. Choose one of the following options:
Hosted: Choose this option if the data connector is installed/running on the main system host and connecting remotely to the data source.
Remote: Choose this option if the data connector software is installed on a different device/host from the main WIP host. Typically, this would be in a distributed type of system where the data connector needs to reside at the “edge”, and pass data back up to WIP.
Mode
Select the type of data source being connected. Choose one of the following options:
Historical: Choose this option for time series data that can be read in single points or large chunks.
Real-Time: Choose this option if the data connector just needs to poll the external data source and retrieve a value. This value will be recorded with a timestamp at the time it is read.
Protocol
Specify the connection protocol used to retrieve or send data.
Description
Provide additional information about the data connector to aid in better identification.
Allow Write
Select this option to permit the data connector to send data back to the external system.
Enabled
Select this option to activate the data connector. Deselect it to deactivate the data connector and stop its operation.
Click Save to create the new record.
Result
A new row is created in the grid. The columns display the main properties of the data connector, as well as the last attempt to read or write data and the last successful connection to the external data source. If there is a significant delay between the last successful connection time and the last connection attempt, it indicates that the connector is either failing to establish a connection or experiencing long delays in connecting or reading/writing data.
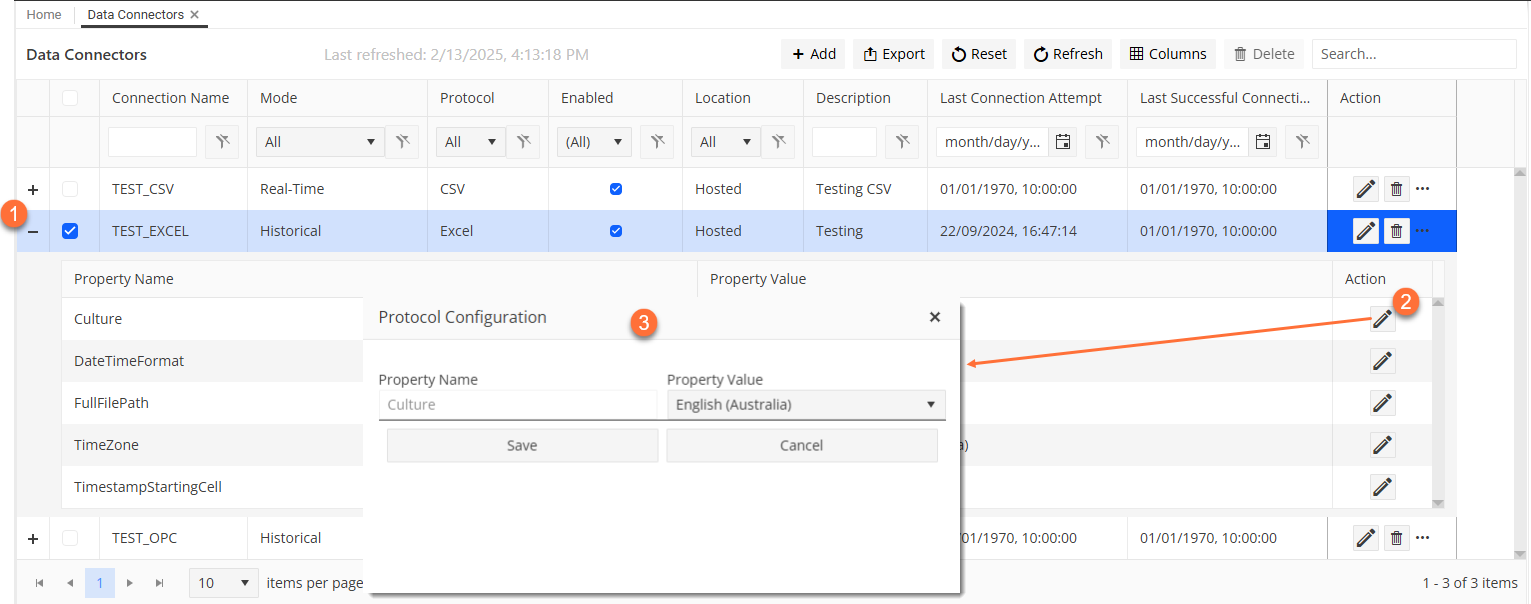
In addition to the columns, new properties are added to the data connector, which are specific to the tupe of the data connector (the selected Protocol) and are visible when you click
in the first column of the row. For example, if the data connector deployed was an OPC DA type, the additional properties would be properties needed to connect to an OPC DA server such as the HostName/IP Address and the OPC Server ProgID.Specify the parameter values specific to the connector type (Protocol) as follows:
Click
in the first column of the data connector row to expand the list of Protocol-specific properties.Click
 in the Action column of the required property.
Specify the property values as required.
Save your entries.
Edit Data Connectors
To make changes to existing data connectors, follow the steps below:
Choose from the menu.
On the Data Connectors pane, proceed in one of the following ways:
To edit the main parameters of the data connector, click
in the Action column of the main data connector line.To edit the Protocol-specific parameters of the data connector, click
in the first column of the data connector row to expand the list of Protocol-specific properties and then click in the Action column of the required property.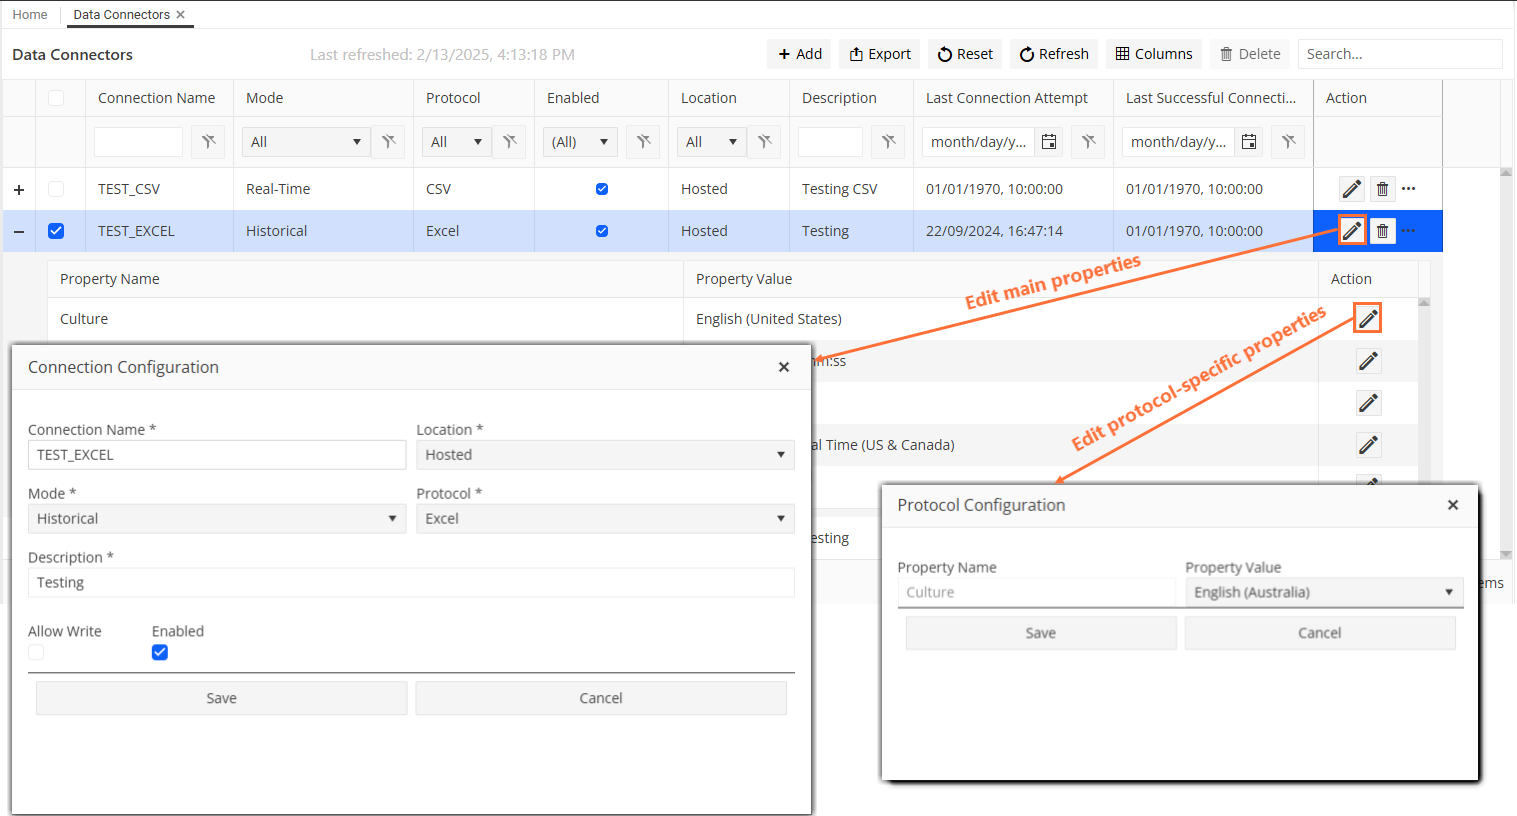
Update the field values as required.
Save your changes.
Delete Data Connectors
To delete data connectors, follow the steps below:
Choose from the menu.
On the Data Connectors pane, proceed in one of the following ways:
Select one or more data connectors in the grid and click
 Delete on the toolbar (Option 1).
Click
in the Action column of the data connector that you want to delete (Option 2).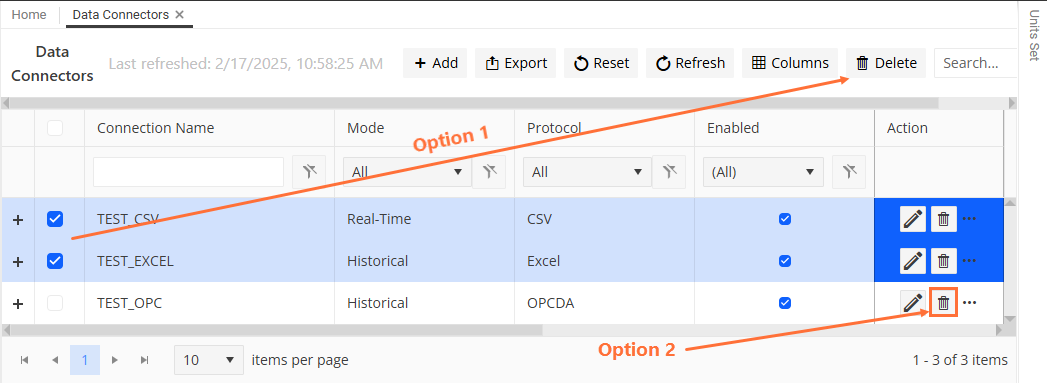
Confirm the deletion.